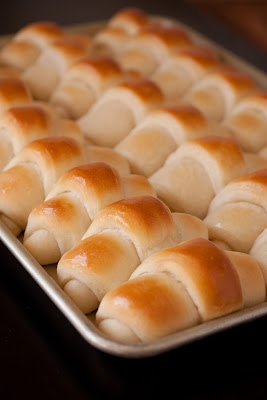
Is there anything like a fresh, hot out of the oven, homemade dinner roll? Dinner rolls are a classic that will never fade. These dinner rolls are dangerously good! How could something with so few simple ingredients be so delicious? I will tell you how: lots of butter, whole milk and a little patience. While creating this recipe, I was looking to achieve a tender, pillow-y soft texture, along with a light sweetness that wasn’t overpowering (if I wanted a roll that was super sweet I’d just have cake), with just the right amount of moisture and fats – hence the use of whole milk along with the butter. I prefer a larger ratio of milk than water because water has zero flavor so why let it waste good space in the roll?
I love making fresh breads and rolls, because I let my KitchenAid mixer do all the work =). The hardest part is that “little patience” I mentioned before, the rising time. I wish they’d just go POOF! in a number of seconds and be beautifully risen. If only. The nice thing about it though is that it basically forces me to get that sink-full of dishes done while I’m waiting. If you don’t have a stand mixer you could also make these the good old fashioned way, kneading by hand.
I hope you love these rolls and serve them as the perfect complement to your holiday feasts and family gatherings. Come back soon as I’ll be posting 3 specialty butter recipes that you can spread along these divine dinner rolls (as if they needed any upgrade but these butters just push the rolls over the top). Enjoy and share… really, because I’m warning you if you don’t share you’ll want all 24 rolls to yourself!
Check: https://www.iwantoo.com/slow-cooker-chicken-tortilla-soup/
Amazing Dinner Rolls
These amazing dinner rolls are so easy and sure to impress
Prep Time: 20 minutes
Cook Time: 19 minutes
Servings: 24 rolls
Calories: 159 kcal
Author: Jaclyn
- 1/3 cup warm water , 110 – 115 degrees
- 2 1/4 tsp active dry yeast
- 1/3 cup + 1/4 tsp granulated sugar
- 1 1/3 cups whole milk , warmed to 110 – 115 degrees
- 3/4 cup salted butter , at room temperature, divided
- 1 large egg , at room temperature
- 1 1/2 tsp salt
- 4 1/2 cups all-purpose flour*
-
Measure out warm water into a liquid measuring cup then stir in yeast and 1/4 tsp sugar, whisk until yeast has dissolved then let rest 5 – 10 minutes until mixture is foamy.
-
Pour yeast mixture (scrapping out excess) into the bowl of an electric stand mixer fitted with whisk attachment, add in 1/3 cup sugar, warm milk, 5 Tbsp butter, egg and salt. Blend mixture until combine. Add in 2 cups flour and mix until well combine.
-
Switch attachment to a dough hook, with mixer on low speed, slowly add remaining 2 1/2 cups flour and mix until dough is smooth and elastic, about 4 – 5 minutes (dough should be slightly sticky when touched).
-
Transfer dough to a greased, large mixing bowl and cover bowl with plastic wrap. Allow dough to rise in a warm place, free from draft, until double in size, about 1 1/2 hours.
-
Punch dough down and divide dough into two equal portions. Shape each portion into a ball.
Dinner Roll each dough ball out on a lightly floured surface into a large circle about 13 inches across (try to keep dough as much of an even thickness as possible).
-
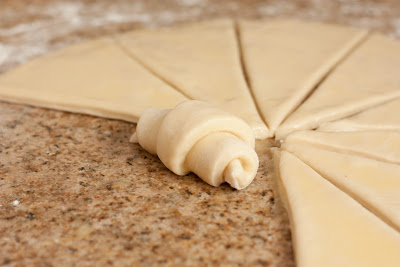
Spread each circle of dough evenly with 2 Tbsp butter. Cut each circle into 4 equal quarters, then each quarter into 3 wedges (just imagine cutting pizza slices or pie slices). Roll each wedge up, beginning on wide (outside) edge.
-
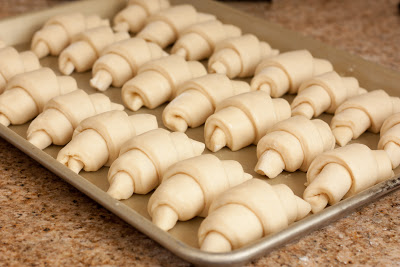
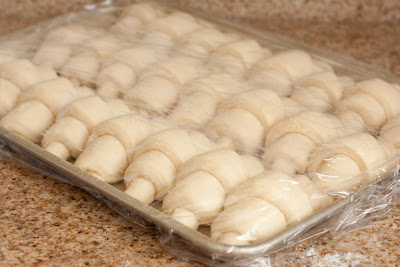
Transfer rolls to a buttered 10 x 15 inch cookie sheet (the tip of the rolled wedge should be tucked on the bottom. Note that you can fit 3 rows of 8 rolls). Cover rolls loosely with plastic wrap and let rise in a warm place until double in size, about 1 hour.
-
During the last 10 minutes of rising preheat oven to 375 degrees.
-
Remove plastic wrap and bake rolls in preheated oven for 15 – 19 minutes until golden brown. Remove from oven and brush with remaining 3 Tbsp butter (you may not need all of it). Serve warm or allow to cool and store in an airtight container.
-
Recipe Source: Cooking Classy
- *I found 4 1/2 cups to be perfect for me but if you live somewhere very dry or humid, or at a very high altitude you may want to reduce or increase measurement by a 1/4 of a cup, just note the dough should be fairly sticky. Don’t add too much flour or your roll will be heavy.
- The dough should be sticking to the bottom of the mixing bowl near the end of mixing just not the sides. It should stick slightly to a clean fingertip then spring back slightly when pulled away. Not gummy and not dry.
- Most of you will probably find 4 1/2 cups to work just right as well.
After first rise, divide dough into two equal portions and shape each into a ball.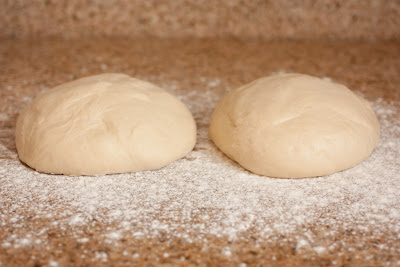
Roll each ball into a 13 inch circle.
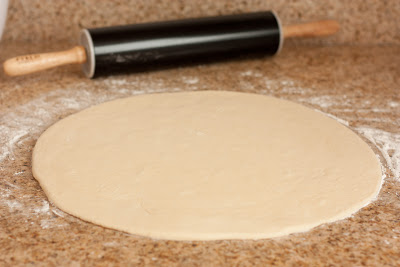
Spread softened butter evenly over entire surface. Using a pizza wheel, cut circle into 4 equal quarters then cut each quarter into 3 equal wedges.
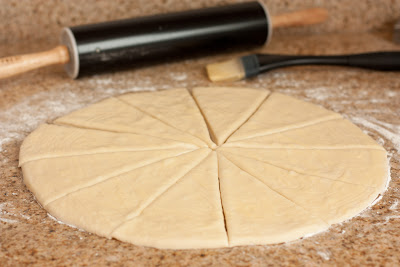
Snugly roll each wedge.
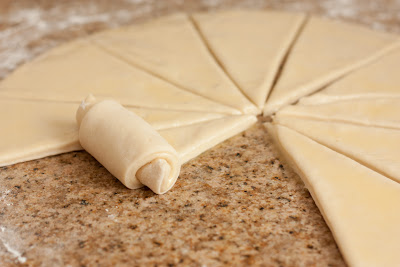
The tip of the wedge should be tucked under the bottom, like so.
Transfer and align rolls on a buttered baking dish.
Cover with plastic wrap and let rest until double in size, about 1 hour.
Bake in preheated oven 14 – 16 minutes.
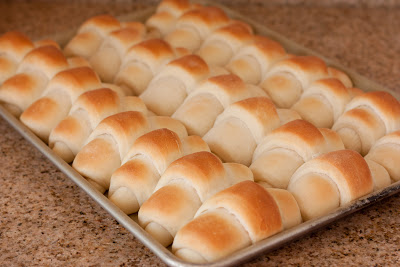
Coat tops with butter.
Pull rolls apart. Serve warm.


